SSH
Accessing systems via SSH
Introduction
The SSH integration in XPipe is a core component as most remote connections to your servers are probably going to use SSH.
When establishing connections, XPipe delegates any form of connection and shell handling to your existing command-line SSH client available in the PATH, which is most likely the OpenSSH client. XPipe does not come with its own SSH implementation or other connection handling. Everything is fully realized on top of your installed CLI programs.
Adding connections
There are multiple different ways of adding SSH connections.
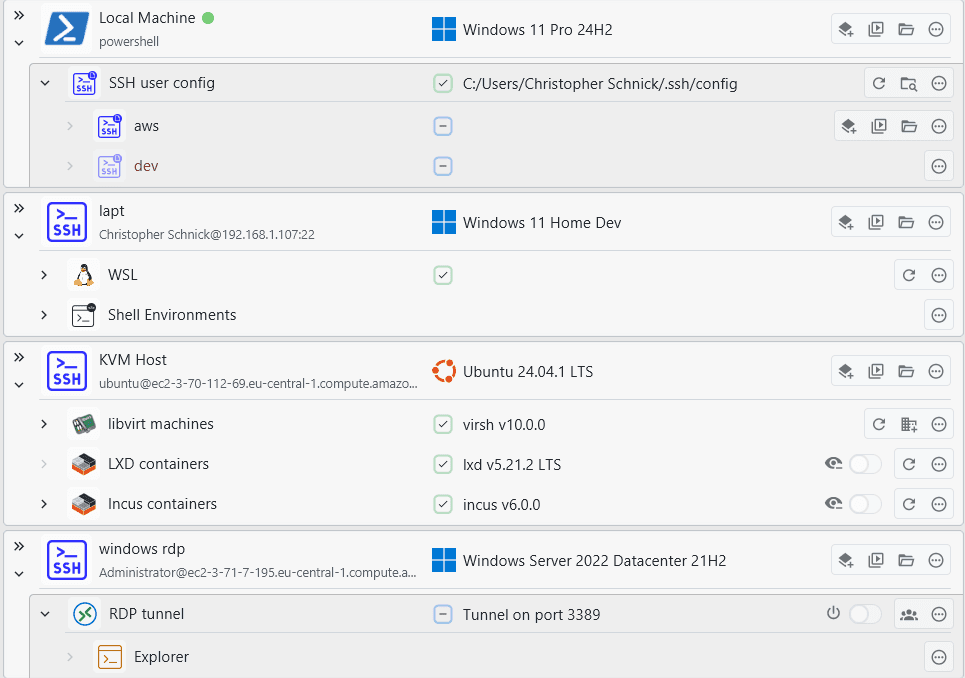
If you are already using an SSH config, you can use the connection entry is defined in it in XPipe by searching for available connections on the local machine.
If you are using PuTTY, see the PuTTY section on how to import connections from there.
If you are using something like tailscale or netbird, see the tailscale docs or netbird docs on how to list all systems automatically.
If most of your servers are hosted at a supported cloud provider like aws or Hetzner, see the respective docs.
If you want to add devices in your network, see the network scan feature at New -> Network scan.
In any other case, you can add new SSH connections at New -> Remote host.
Configuration
The configuration starts with supplying the address. For various types of connections, this is already automatically filled, e.g. when using a cloud provider. On the right of the address field, you can add multiple different addresses to be able to quickly switch between later on.
The next part is the identity, which consists out of the username, optional password, and an optional key. You can either specify these authentication details for this connection only in-place, or also create a new reusable identity with the button to the right of the username field. These identities can then be assigned to other connections as well.
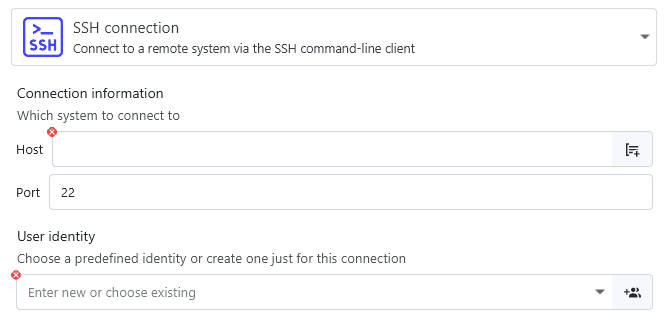
Authentication
Since the topic of SSH authentication is quite large, you can find the reference for setting up password and key-based authentication on the separate ssh auth page.
Gateways and jump servers
If you are planning to establish connections over another intermediate host, you can use XPipe's gateway feature:
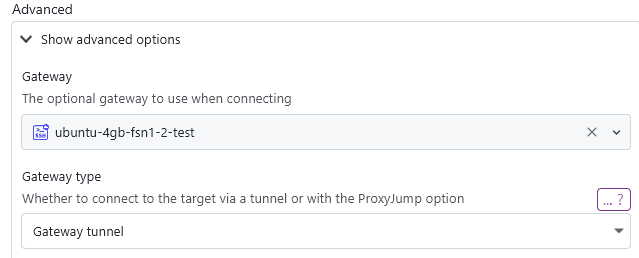
In the dropdown below, you have the choice between using the gateway via a gateway tunnel or as jump server with ProxyJump.
Gateway tunnels
This is the default setting. XPipe will tunnel the host address and port over the gateway host to localhost. This requires the gateway SSH server to have port forwarding enabled with AllowTcpForwarding=yes.
The advantage of not using the usual jump server usage setting is that any eventual connection errors are much clearer than with jump servers as XPipe will connect to the gateway system and the target system separately.
Furthermore, this setting enables you to resolve any DNS names via the gateway system, not from your local machine. In case any address can only be resolved from the gateway system, this setting is required for it to connect successfully.
Jump servers
This will use the system as a jump server with ProxyJump. This option is required if your gateway system is a more restricted system or specially built to only function as a jump server. These kinds of systems often only work with ProxyJump as that is usually the standard way of using jump servers. If gateway tunnels do not work, a jump server gateway should.
Chaining
This gateway system also supports chained gateways and jump servers. This means that if you set a system as a gateway, which already itself has configured a gateway (and so on), the connection will effectively go through 2 intermediate systems before reaching your target system.
To properly make use of chained gateways, make sure that you don't mix between gateways configured as jump servers vs non-jump servers. Either set all gateways to be jump servers or none of them, depending on which gateway type you want to use.
Limited / embedded systems
XPipe works by detecting the shell type of the connection and then interacting with the active shell. This approach only works, however, when the shell type is known and supports a certain number of actions and commands. All common shells like bash, cmd, powershell, and more, are supported. If you are connecting to a system that does not run a known command shell, e.g., a router, link, or some other embedded device, XPipe will be unable to detect the shell type and error out after some time.
To work around these cases, you can explicitly designate a system as such:
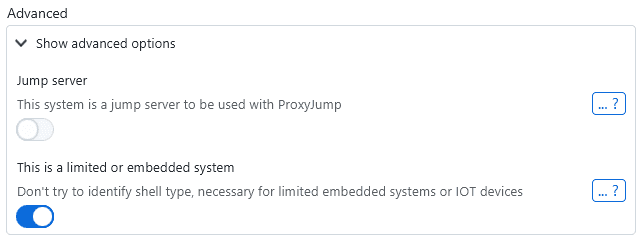
When this setting is enabled, XPipe will not attempt to identify the shell type and launch the shell as-is. This allows you to open the connection without errors, but many features, e.g., the file browser, scripting, subconnections, and more, will not be supported for this connection.
Connection timeout
XPipe launches the ssh process and handles all authentication and more. It is however not aware of the current state of the authentication and login process. After some time has elapsed without any activity, XPipe will consider the connection attempt to be failed. This might cause problems when your authentication method takes a long time to continue, e.g. with a hardware security key, a fingerprint scanner, an external confirmation dialog.
If connections from XPipe fail with a timeout error, you can try whether enabling this option makes a difference. You can find it in the advanced SSH configuration menu:

X11 Forwarding
XPipe supports X11 forwarding for SSH connections. You can enable this in the advanced SSH configuration for a connection:

When this option is enabled, the SSH connection will be started with X11 forwarding set up. On Linux, this will usually work out of the box and does not require any setup. On macOS, you need an X11 server like XQuartz to be running on your local machine.
X11 on Windows
XPipe allows you to use the WSL2 X11 capabilities for your SSH connection. The only thing you need for this is a WSL2 distribution installed on your local system. XPipe will automatically choose a compatible installed distribution if possible, but you can also use another one in the settings menu:
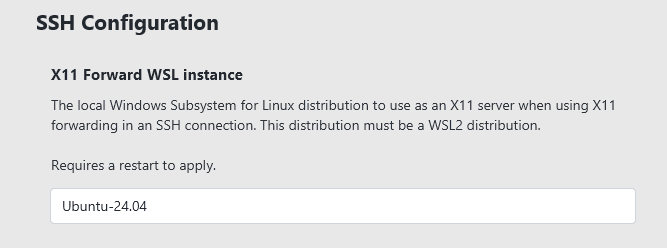
This means that you don't need to install a separate X11 server on Windows. However, if you are using one already, XPipe will detect and use the currently running X11 server.
X11 connections as desktops
Any SSH connection that has X11 forwarding enabled can be used as a desktop host. This means that you can launch desktop applications and desktop environments through this connection. When any desktop application is launched, this connection will automatically be started in the background to start the X11 tunnel.
For more information, see the desktop applications page.
Adding SSH options
SSH connections can be augmented with SSH config options if needed. This bridges the gap between the graphical SSH connection configuration capabilities in XPipe and the full OpenSSH spec, which might be overkill for some cases. If you are just looking to add a simple option for a connection, like accepting a deprecated host key algorithm, you can add this in the advanced configuration:
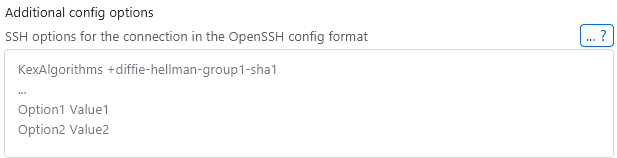
You don't need to specify a Host header, only the raw options itself.
One common case for this is to allow deprecated SSH algorithms that are still used by older servers but not accepted by newer clients. To add the old ssh-rsa algorithm for a server, you can add the HostKeyAlgorithms +ssh-rsa option.
Config files
XPipe fully supports using connections defined in SSH config files. In contrast to many other tools, this is not an import functionality where the config data is converted to internal data. Instead, the config file stays the backing store of the connection information. Any changes you make later on will be reflected in XPipe upon refresh.

Your local SSH configs apply to all SSH connections in XPipe, even if your config file is not added to XPipe or you created SSH connections within XPipe itself. This is important to keep in mind in case any wildcard options defined in your local config file affect other unrelated SSH connections in XPipe.
Adding files
XPipe can load all hosts and apply all settings that you have configured in the selected file. By specifying a configuration option on either a global or host-specific basis, it will automatically be applied to the connection established by XPipe.
Searching for available connections on a system will automatically add the default SSH config file at ~/.ssh/config if it exists. You can also add configs from other locations at New -> Remote Host -> SSH config file. XPipe supports wildcard definitions and include statements of other files as well, meaning that you will get a one-to-one application of your entire config in XPipe. It is exactly applied as it would if you use the ssh command-line client.
If you want to learn more about how to use SSH configs, you can use man ssh_config or read this guide.
Text-based connections
If you want to create a fully customized SSH connection with more options than you can find in the normal SSH connection creation dialog, you can take a look at customized SSH connections. These allow you to specify an SSH connection in-place using the SSH config syntax you know. It is essentially a way to create SSH config connections without having to go through dealing with creating config files. This is recommended if you are an advanced user and know what you're doing.
Note that most features can be realized through normal SSH connections already. Things like ProxyJump chains, additional SSH options, and more can already be used with normal SSH connection entries. Custom SSH connections are only really necessary for very specific use cases.
Format
You can specify connection details just as in an SSH config. The main difference is that you don't need to include an explicit host declaration. For example, the following definitions are semantically equivalent:
User user
HostName example.com
Host myhost
User user
HostName example.comIdentities
Note that you can also specify an IdentityFile option in here. If any identity is specified in here, any otherwise specified identity later down below will be ignored.
X11 forwarding
If any options for X11 forwarding are specified here like ForwardX11, XPipe will automatically attempt to set up X11 forwarding. For more information. see X11 forwarding.
Jump hosts
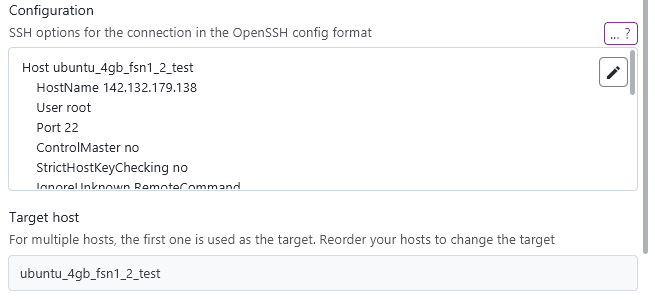
You can also define multiple hosts if you need additional hosts to be used for certain options like ProxyJump. For example, you can also define the following 2 hosts for a custom SSH connection:
Host myhost
    User user
    HostName example.com
ProxyJump jump
Host jump
User jumpuser
HostName jump.example.comIn the case of multiple host definitions, XPipe will always choose the first one as the target host. Therefore, you have to take care of providing the hosts in the correct order, otherwise it will try to connect to an intermediate host. In this case, the ProxyJump option does not need the hosts to be defined in order.
Note that it is recommended to use a proper SSH config file for ProxyJump chains like this as it is not possible for custom SSH connections to specify multiple different authentication credentials. Custom SSH connections are therefore mostly intended for simpler types of hosts and not complex jump chains.
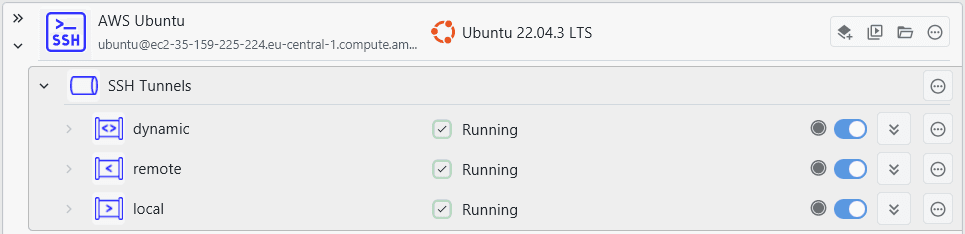
Tunnels
You have full access to SSH tunnel capabilities in XPipe. You are able to create local, remote, and dynamic tunnels that can be toggled on/off at any time. Tunnels can be created for any SSH-based connections. This includes VM connections, tailscale connections, teleport connections, and more.
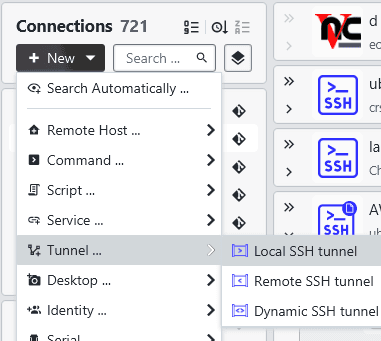
Local tunnels
If you are looking for a more user-friendly experience for tunnels, check out services instead. Raw SSH local tunnels it only makes sense to use instead of services if you want to use more advanced tunnel bindings.
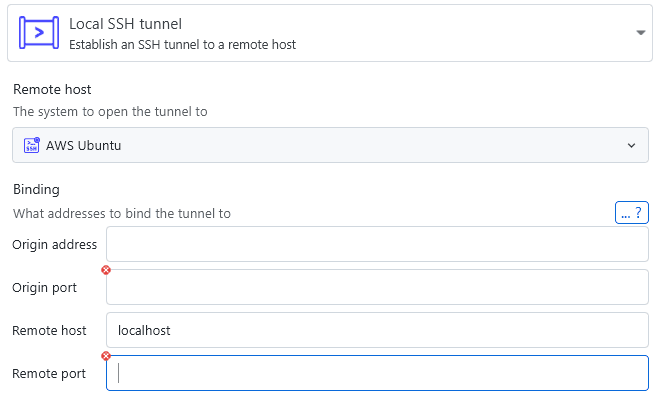
The binding information you provide is passed straight to the ssh client as follows: -L [origin_address:]origin_port:remote_address:remote_port. By default, the origin will bind to the loopback interface if not specified otherwise. You can also make use of any address wildcards, e.g. setting the address to 0.0.0.0 in order to bind to all network interfaces accessible via IPv4. When you completely omit the address, the wildcard *, which allows connections on all network interfaces, will be used. Note that some network interfaces notation might not be supported on all operating systems. Windows servers for example don't support the wildcard *.
Remote tunnels
Remote tunnels cannot be instantiated via any other means like services, so if you're looking to create one, you will have to use the remote tunnels.
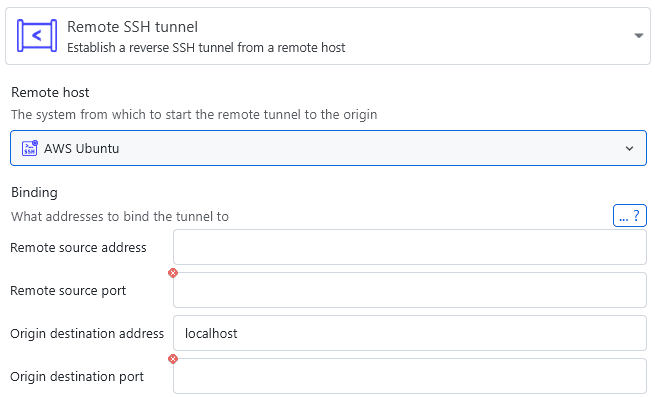
The binding information you provide is passed straight to the ssh client as follows: -R [remote_source_address:]remote_source_port:origin_destination_address:origin_destination_port. By default, the remote source address will bind to the loopback interface. You can also make use of any address wildcards, e.g. setting the address to 0.0.0.0 in order to bind to all network interfaces accessible via IPv4. When you completely omit the address, the wildcard *, which allows connections on all network interfaces, will be used. Note that some network interfaces notation might not be supported on all operating systems. Windows servers for example don't support the wildcard *.
Dynamic tunnels
Dynamic tunnels set up a connection that will forward traffic to a remote server, irrespective of the destination port. You can effectively use it as a SOCKS5 proxy server.
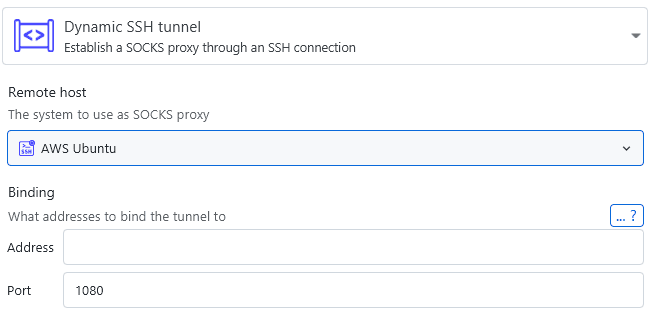
The binding information you provide is passed straight to the ssh client as follows: -D [address:]port. By default, the address will bind to the loopback interface. You can also make use of any address wildcards, e.g. setting the address to 0.0.0.0 in order to bind to all network interfaces accessible via IPv4. When you completely omit the address, the wildcard *, which allows connections on all network interfaces, will be used. Note that some network interfaces notation might not be supported on all operating systems. Windows servers for example don't support the wildcard *.
SFTP sessions
By default, any session opened in the file browser will use an SSH shell-based session to allow for more flexibility by running commands. However, a side effect of this is that transfer speeds are a bit slower and some connections might fail if the target system only allows for pure SFTP and no SSH shells.
To open an SFTP session to a system in the file browser, you can mark the system as limited/embedded. This will automatically attempt to open an SFTP session as these kinds of systems often do not support shells. Alternatively, you can switch to pure SFTP in any SSH-based file browser session in the context menu for a directory:
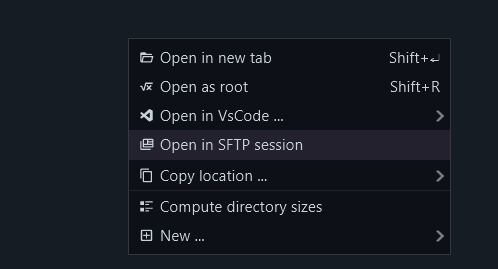
You can see in the tab name whether you are using an SFTP session or not:
![]()
Note that SFTP sessions are limited compared to shell-based sessions in terms of features as no commands can be executed.
PuTTY
If you are using PuTTY (or KiTTY) and are now moving to XPipe, there are a few things to look out for.
Existing connections/sessions saved in PuTTY can be imported somewhat into XPipe on Windows by searching for available connections on the local machine:
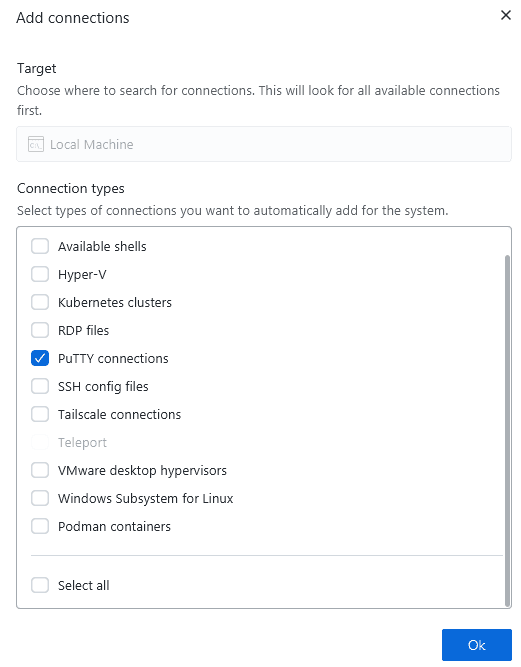
This will import connections from the registry. If your connections are not saved to the registry, e.g., when using a portable version of PuTTY/KiTTY, you can still import them by explicitly saving all session data to the registry as shown here.
The imported data is not fully complete though. Passwords aren't imported and ppk keys can't be imported due to the format incompatibility.
.ppk keys
PuTTY has its own non-standard SSH key file format with .ppk files. This poses a challenge as these are not supported by OpenSSH, nor can they be automatically converted to the standardized .pem format. The best that you can do is manually export them into the correct format from PuTTY as shown in the documentation.
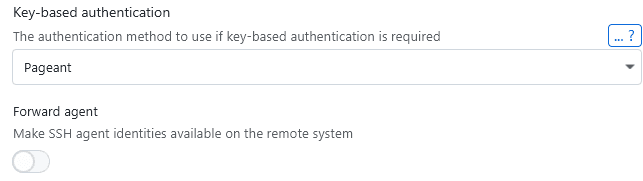
If you only have a few keys added to PuTTY, this manual convert option should work fine. For more keys, it might make sense to keep them in PuTTY's pageant, which is the PuTTY equivalent to the SSH agent. You can configure a connection in XPipe to use pageant for keys:
VSCode
If you have VSCode installed on your system, you can also use XPipe to launch the SSH remote development feature of VSCode from XPipe.
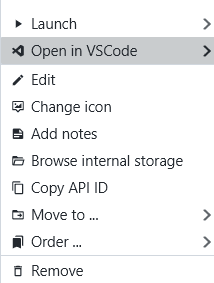
This option will show up if VSCode is installed and the SSH connection can be launched with VSCode. All SSH config connections can be launched in VSCode. For other connections defined in XPipe itself, the VSCode feature only supports password authentication. If you are using normal SSH connections with key-based authentication, this option will not show up by default. As a workaround, you can define the connection in your local SSH config and then add that config to XPipe.
Windows SSH servers
Since Windows 10, Microsoft has been shipping an OpenSSH client and server with Windows that you can use. You just have to enable the OpenSSH server feature for your Windows installation as shown here. On the latest Windows 11 systems, it might already be preinstalled.
If you are planning on configuring key-based authentication for your SSH server instead of just password authentication, note that Windows SSHD has an additional layer of complexity involved when adding authorized keys for users which have administrator privileges. You have to add public keys for these users into a separate administrators_authorized_keys file as explained here.
Troubleshooting
With SSH, a lot can go wrong. And since many OpenSSH error messages are very vague, troubleshooting might not be straightforward. This section compiles a few common issues. Note that since XPipe just uses your OpenSSH client, many resources and solutions you find online will also apply to XPipe.
See the SSH troubleshooting page for details.