First steps
Starting out with XPipe
Introduction
Once installed, you can start with adding your first connections to XPipe. You will be greeted by the introduction screen, which gives you the option to automatically add all available connections on the local machine:
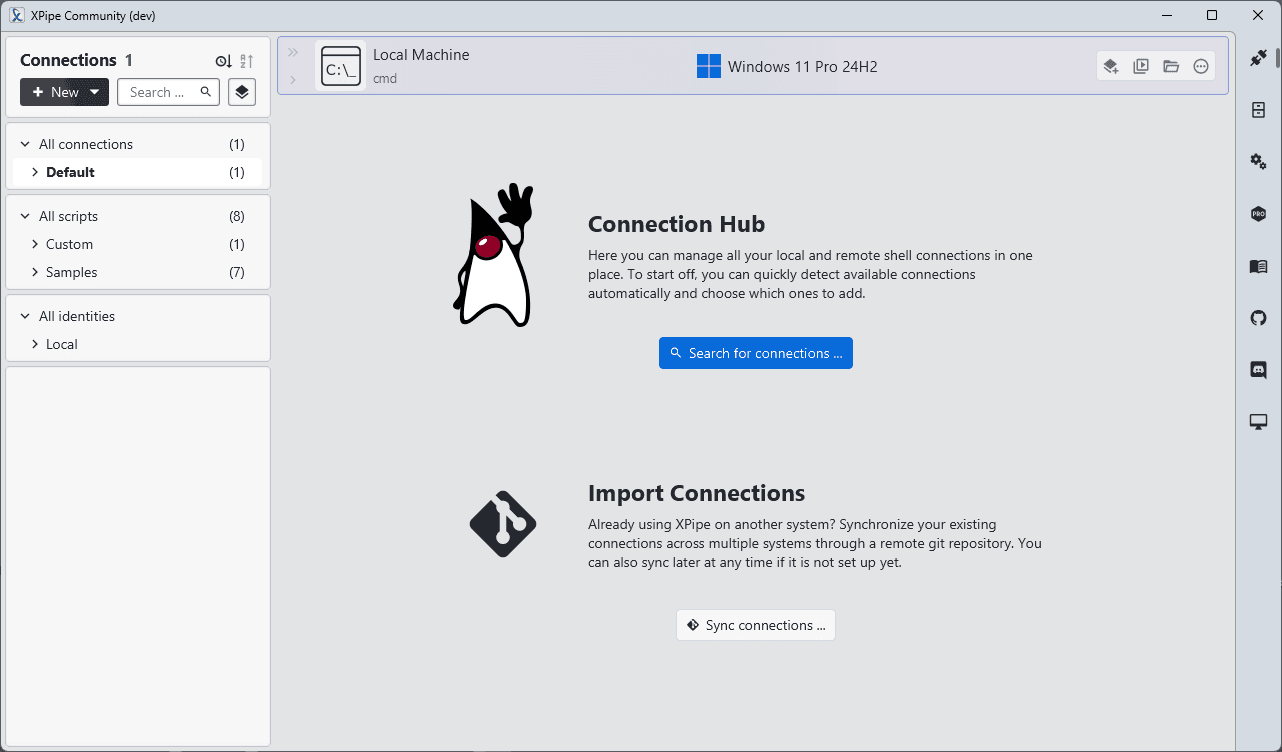
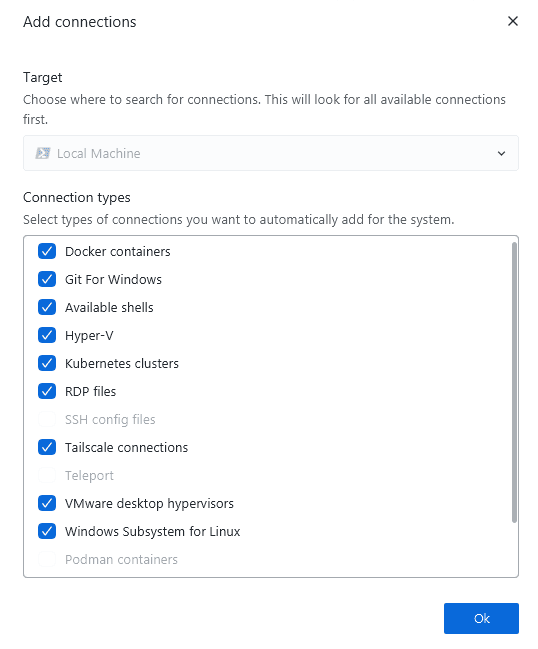
In contrast to many other tools, XPipe is not just a remote connection tool. It can also be used to access your locally installed shells, VMs, containers, and more. The local search for available connections should add all supported local tools plus various remote connections:
Adding remote connections
Once XPipe has added all available local connections it could find, you can continue by adding your first remote connection. In most cases, this is probably an SSH-based connection. There are multiple different ways of adding SSH connections:
If you are already using an SSH config or PuTTY, the connection search will pick up the config file hosts.
If you are using something like tailscale or netbird, see the tailscale docs or netbird docs on how to list all systems automatically.
If most of your servers are hosted at a supported cloud provider like aws or Hetzner, see the respective docs.
If you want to add devices in your network, see the network scan feature at New -> Network scan.
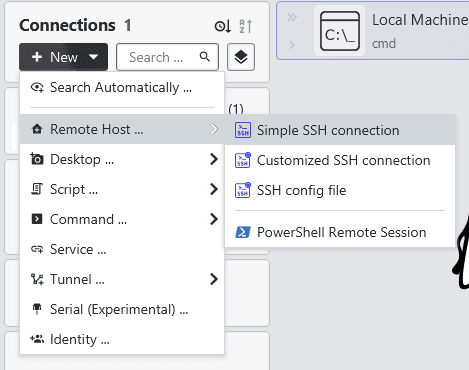
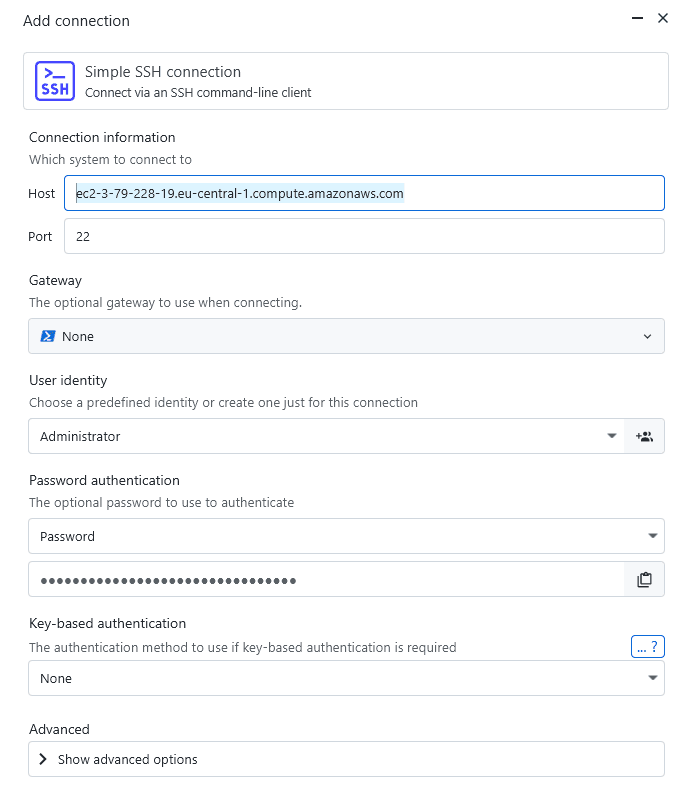
In any other case, you can add new SSH connections at New -> Remote host:
This SSH connection creation dialog should be straightforward so that you only have to enter your connection details.
If your connection requires passwords, and you are using a password manager, you can look into integrating your existing password manager with XPipe in the password manager guide.
For key-based authentication, XPipe supports many different key sources, ranging from a simple file, over various agents, to hardware security keys.
If you're looking to customize your connection even more, e.g., with jump servers, or custom SSH config options, you can take a look at the full SSH guide.
After your connection has been validated, you will see the automatic connection search dialog again, allowing you to add all supported connections on that remote system automatically.
If you encounter any issues with this SSH connection, you can refer to the SSH troubleshooting guide. As XPipe has a different approach compared to most other SSH clients and uses your local OpenSSH client instead, there might be a few behavioral differences between XPipe and other SSH clients.
Terminals
In contrast to other SSH clients, XPipe does not come with its own integrated terminal. Instead, it fully relies on you using your own terminal with XPipe. When you click on a connection in the connection hub interface, your default terminal should open. On startup, XPipe it tries its best at determining the best possible matching terminal installed to use. If you don't like the default selection, you can change it at Settings -> Terminal. There you will also find a list of all supported terminals to choose from.
XPipe also supports various other terminal-related tools such as terminal multiplexers and terminal prompts. So if you are using a multiplexer like tmux already, you can keep using it with XPipe. The same goes for prompt tools such as starship or oh-my-posh. You can find all the related configuration options in the terminal settings as well. For more details, see the terminal docs
Password managers
XPipe comes with integrations for many popular password managers, allowing you to retrieve passwords from your password manager instead of having to store the secrets itself. You can configure the password manager to use in the settings menu at Settings -> Password manager.
You can check in the password manager guide whether your password manager is supported and how to configure it. You can also find information in there on how to use the SSH agent if your password manager has one.
RDP and VNC
XPipe also comes with support for RDP and VNC connections. You can create those connections at New -> Desktop .... For VNC connections, XPipe has a built-in VNC viewer. Alternatively, you can also use an external VNC client if you already have one. For RDP, you require an external RDP client. You can configure those at Settings -> VNC and Settings -> RDP.
RDP and VNC connections can either be established directly or also via an SSH tunnel over an existing SSH connection. For more details, see the VNC docs and RDP docs. There is also extensive support for running remote applications directly in addition to normal RDP/VNC sessions. For details, see the desktop application docs.
Web services
If you have to constantly juggle between 5 different web-based management dashboards for your servers and applications, you might be interested in the services and tunnel features of XPipe. With this integration, you can automatically open and tunnel arbitrary web services from remote systems to your local machine automatically. You can find details in the services docs.
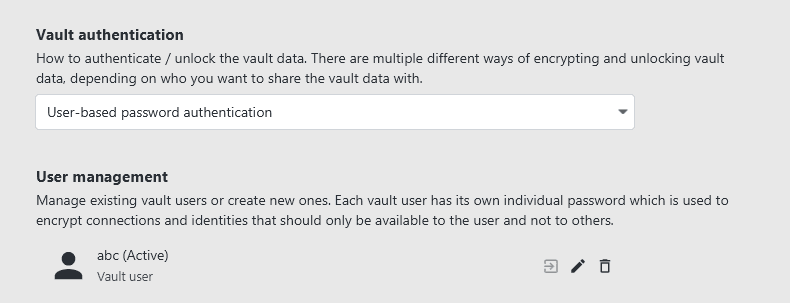
Vault encryption
To create a custom passphrase for your vault to encrypt your data with, check out the vault user settings at Settings -> Vault:
If you have further questions about the security model of XPipe in general, check out the security reference.
Synchronization
If you are looking to use XPipe on multiple systems, this synchronization feature should be interesting for you as it allows you to have access to all your connection data from all your XPipe installations.
For that, it uses a remote git repository to sync with. The only thing you need is either a GitHub account or any other platform to host a private repository. Self-hosted git repositories are also supported. You can check out the synchronization guide for detailed instructions on how to set this up. This synchronization feature also supports teams, so that you can sync to one central remote repository while still keeping your individual authentication options like passwords and keys private so they can only be decrypted by you.
User interface
The basic user interface should be pretty self-explanatory. If you're looking for a full guide on how to use all the advanced features it offers, check out the connection hub docs and file browser docs.
Shell scripting
If you have an arsenal of shell scripts that you often use, you can take a look at the shell script docs and how to utilize them with XPipe.
Automation
If you like scripting and automating various actions, you can check out:
- The connection launch docs for automatically launching connections
- The action automation docs for automating arbitrary action in XPipe
- The Python API docs for programmatic automation from a Python script
- The HTTP API docs for programmatic automation from any other kind of language or API client
- The MCP server docs for automation from an AI agent that supports the MCP protocol