Automating actions
Launching shell connections in various different scenarios
Introduction
XPipe comes with a powerful action system where every action you perform, e.g. when you click on a connection to open a terminal, is mapped distinctively to a certain action schema. This means that you can replay any action automatically if you have the action data in serialized form. For example, the action to launch the local machine connection in a terminal looks like this:
{
  "ref" : "f0ec68aa-63f5-405c-b178-9a4454556d6b",
  "id" : "open"
}
Through various different interfaces, you can then automatically run this action. These interfaces include desktop shortcuts, URLs, and API requests. This action system also supports actions in the file browser and batch actions.
Recording actions
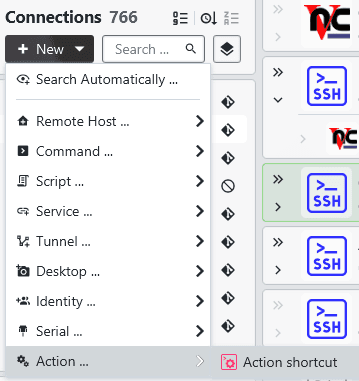
If you are looking to automate an action, you first have to obtain the schema data. You can do this via the action shortcut functionality:
Once clicked, you enter the recording mode. The next action you perform in the GUI will not be run as normal but will be opened in the action shortcut dialog instead:
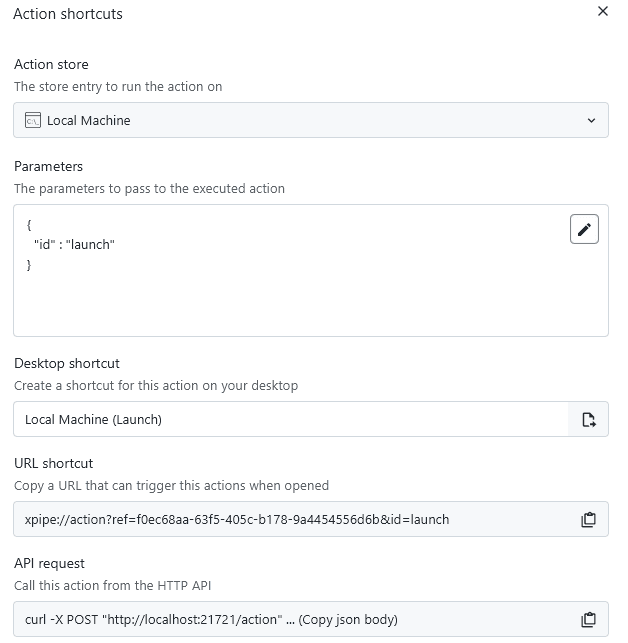
Here you can configure the action parameters and targets if you want. You can then create a desktop shortcut, copy a URL, or copy the raw json body for an API request.
Desktop shortcuts
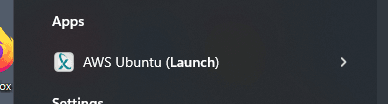
The desktop shortcut button will create a shortcut on your desktop:

This is supported on all operating systems, each shortcut is adapted to fit in with the operating system and desktop environment. This means that you can use these shortcuts in many different contexts like the start menu, taskbar, dock, and more:
Action URLs
As an alternative to desktop shortcut, you can also copy a specially formatted URL instead. The xpipe:// URL can be opened with XPipe.
If you are using an installer distribution, these automatically register the URL handler to the operating system. In that case, you can open the URL with any tool. You can paste it into the browser address bar, or run a local command on your system to open the URL:
start xpipe://...in cmd,Start-Process "xpipe://..."in PowerShellxdg-open xpipe://...on Linuxopen xpipe://...on macOS
If you are using a portable distribution, these URLs are not automatically registered. In that case, you can open them with xpipe open xpipe://.... You can find the xpipe executable in the installation binaries directory.
API requests
For an increased degree of automation, using the HTTP API for scripting is a suitable solution. Using a simple API call via the Python API, it is possible to call an action like this:
import json

from xpipe_api import Client

if __name__ == "__main__":
    client = Client(ptb=False)
    data = json.loads('''{
      "ref" : "f0ec68aa-63f5-405c-b178-9a4454556d6b",
      "id" : "open"
    }''')
    client.action(data, False)
For more information on how to work with the Python API, how to obtain connection UUIDs, and more, take a look at the Python API page.
Confirming actions
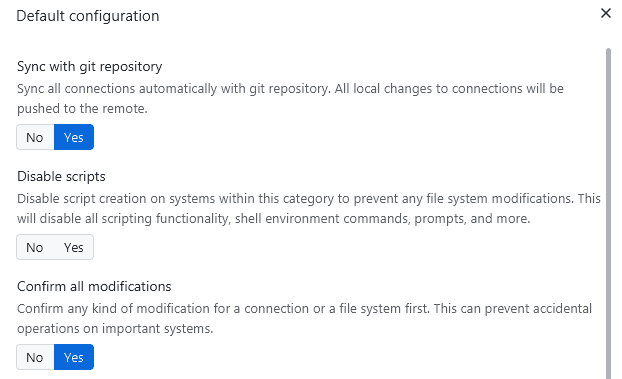
In a production environment, you might want to double-check any action you perform to avoid any accidents. XPipe gives you the option to configure a category to require an explicit confirmation for any action that modifies some data:
When enabled, you will get a dialog like this for any connection contained in the category:
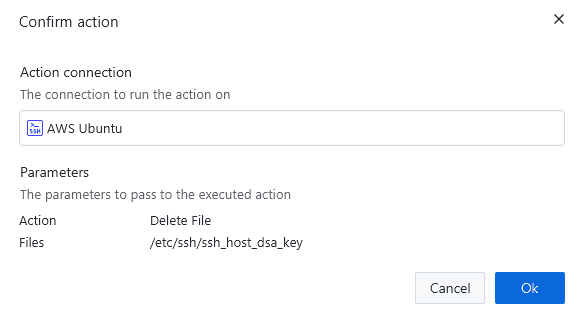
The data shown for the action parameters is the same raw data you will find in the action-specific json schema.