Shell scripts
Fully customize your workflows with shell scripts
Introduction
XPipe's scripting functionality for shells allows you to extend and customize your workflow with your own shell scripts. Scripts can be used in many places in XPipe, each with unique properties. In summary, you can run scripts
- On remote shell init in your terminal, in addition to the shell's rc files
- In the connection hub, on the dedicated scripts button for each connection
- In the file browser, with selected file paths as script arguments
- In an active terminal session opened from XPipe
Shell types
Each remote system you connect to has only specific shells installed. This can include something like cmd, powershell, bash, etc. Any scripts you create will also be bound to a certain shell. For example, if you create a bash script, it won't run on a Windows system. If you create a zsh script but your system does not have zsh installed, then you won't be able to run the script there as well. Therefore, the first choice you have to make is which shell type you are creating a script for:
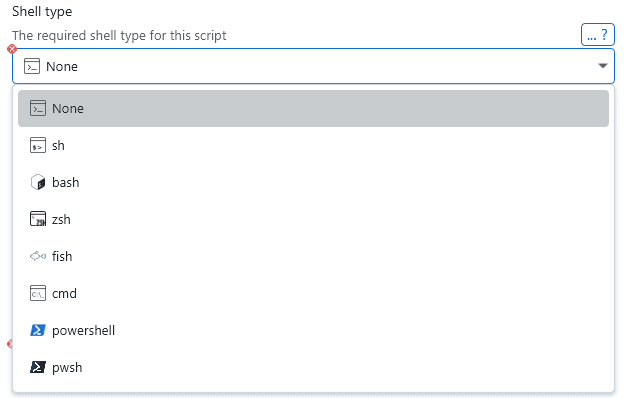
Any script declared as a sh script will be able to run in any posix-related system environment. If you intend to run a basic script on many different systems, then using only sh syntax for your scripts is the best solution. For Linux servers, focusing on bash scripts is also a good target for compatibility.
Script sourcing
By default, XPipe will attempt to source the script if possible. This means that it will run . <script>.sh if the script shell type is supported by the login shell of the system. Therefore, trying to achieve script compatibility of your scripts with the login shells of your systems is important if you want to be able to set stuff like environment variables from your scripts. Environment variables set in a script only persist to the rest of the shell session if the script can be sourced.
A sh script can be sourced by bash or zsh login shell as those are compatible. A zsh login shell can't source a bash script however. A fish login shell only supports sourcing other fish scripts, so you will have to take this into consideration when choosing script types and login shells.
Enabled state
Each script has a toggle that you can use to enable or disable a script. A script must first be enabled for it to appear anywhere in XPipe. This toggle allows you to control which scripts you want to use at the moment, so you can ignore the ones you don't need without having to delete them. You can also enable whole groups of scripts by toggling the group itself:

It is usually a good idea to check if a script is actually enabled if it is not run or does not appear in the menus as expected.
Authoring scripts
Since you can use a script in several different scenarios, you should first choose which execution type you want to create the script for. These different types are explained in detail below.
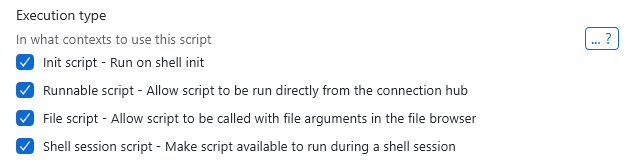
You can also check multiple boxes for a script's execution types if you want to use it in multiple scenarios.
Editing
You can either edit scripts in-place in the text box or use the external edit button in the top right corner to launch an external text editor:
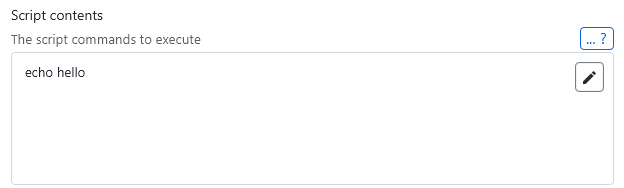
Any changes you make in the launched external editor will be automatically applied when you save. Using an editor is recommended to have full support for any shell syntax you want to use. The file extension is applied automatically, meaning that your external editor should pick up what kind of script do you are creating.
When creating scripts, a shebang line for shells that support it is not necessary, one will be added automatically with the appropriate shell type you specified earlier if needed.
Dependencies
For more complex scripting tasks, it is also possible to create multiple independent reusable script parts, each of which performs a specific task. If you want to bring them all together, you can create a script with those other scripts as dependencies. This will make all the dependent scripts run before the actual script, allowing you to chain multiple scripts together and avoid duplication.

Script types
Init scripts
The idea of init scripts is to be able to take your environment configuration to all remote shells. Essentially, you can configure what commands to run when you log into a remote system in a terminal. For example, if you want certain aliases, prompt settings, or extensions to be automatically available in your remote shell session, then init scripts are the way to go.
Any script that is enabled, compatible with the remote system's shell, and marked as an init script will be run when a new terminal session is started on any connection.
Basic example
As a simple example, you can create a script like this
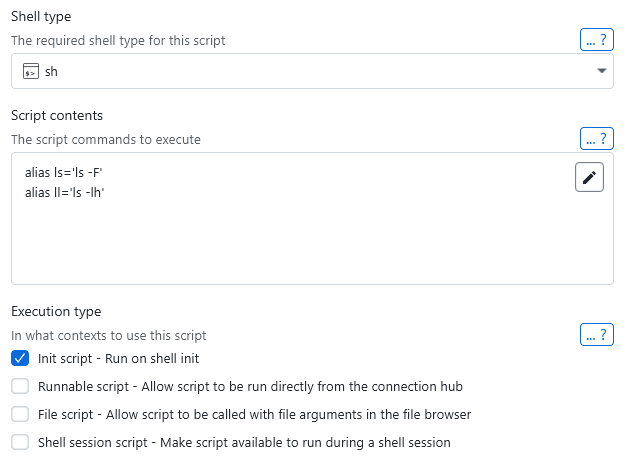
to have your aliases available in your remote shells.
Shell environments
As an alternative to having all enabled init scripts run whenever a remote shell session is started, you can also create shell environment configurations to use only a selected subset of scripts specific to this environment. These don't even need to be enabled to run.
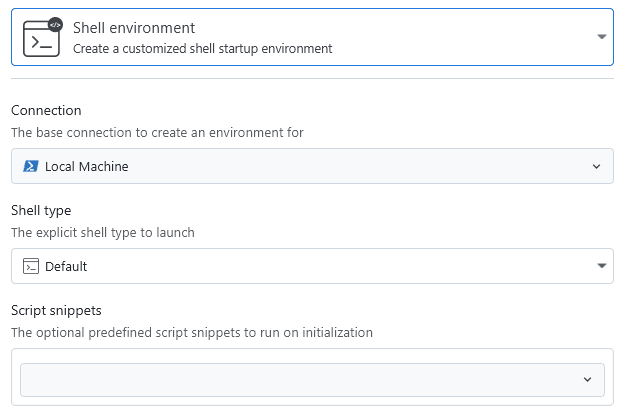
This is also useful if you're looking to run scripts as a different user, e.g. as root. Shell environments provide the ability to launch them elevated via sudo, so any scripts you run in them will also be run as root.
Runnable scripts
Scripts can also be run on demand on any system from the connection hub. Any script that is enabled, compatible with the remote system's shell, and marked as a runnable script can be run from the script context menu for a connection.
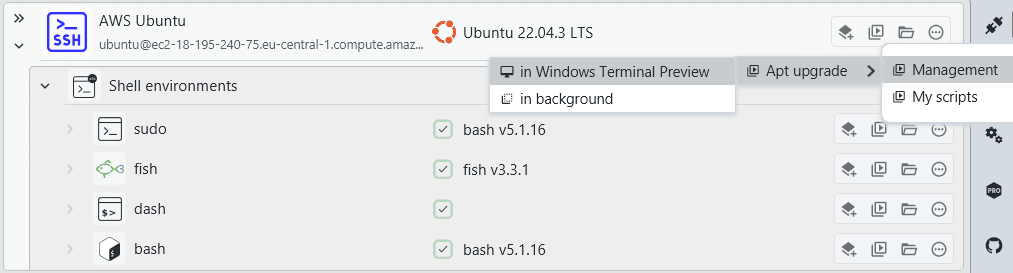
This is useful for actions you want to perform at any time. In this example, you can create a simple script for a frequently performed action, e.g.:
sudo apt update && sudo apt upgradeArguments
If you are looking to execute your scripts with custom arguments, it is recommended to use them as shell session scripts instead. With them, you can call the same scripts with any custom set of arguments from your terminal session.
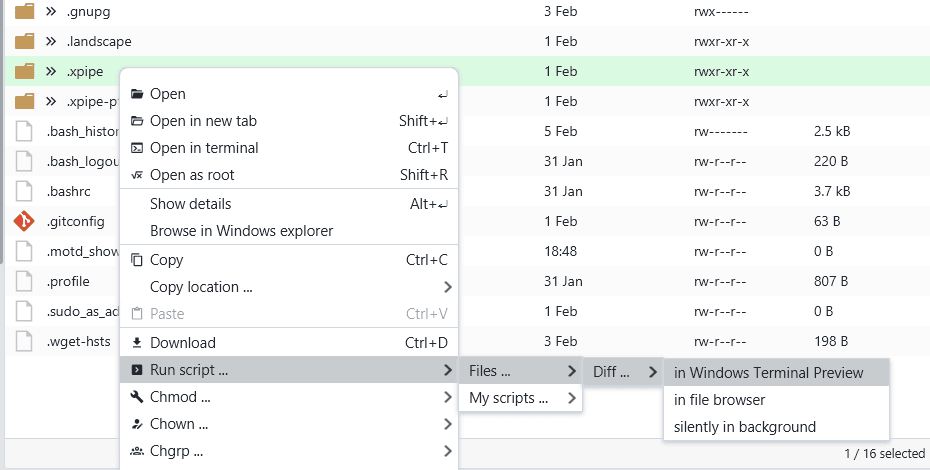
File browser scripts
All file browser sessions that work through shell connections also support the execution of arbitrary commands. In addition to the pre-existing actions found in the file context menu, you can add your own commands.
Any script that is enabled, compatible with the file browser session shell, and marked as a file script will appear in the file browser context menu.
Arguments
One of the core features of file browser scripts is the support of arguments, which are provided by the file browser selection. So if you have one or more files selected in the file browser, they are automatically passed as arguments to the script as normal. This is the same as simply running myscript.sh "<file 1>" "<file 2>" manually. The behavior of passing arguments is the same for all shells, so if you're implementing a cmd script instead, you can refer to it with ~%1, ~%2, and so on. The arguments are ordered by the time of selection.
Note that there is currently no verification for arguments, so if you have a different number of files selected than your script actually requires, you will still be able to call the script from the menu. So to avoid any mishaps, it is recommended to validate the script arguments to have the correct amount. This also applies to file types, so a script that takes a directory as input should check to see if it was not accidentally called on a file instead.
Execution
You can either run the script in a new terminal window, or in the file browser to just see its output. If your script requires any interactive input, you should run it in a terminal. If you only care about the output, and no interactivity is required, running it in the file browser will work fine.
For example, if you want to create a script that diffs two files, using the script
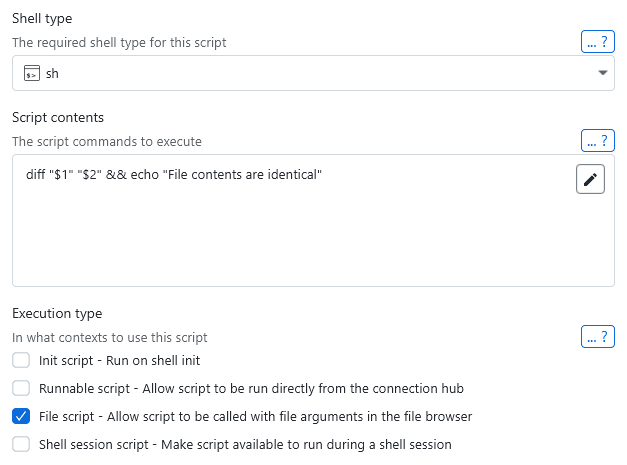
will allow you to do this by running the script with two files selected.
The working directory of the scripts will also be the current directory you are in the file browser. So it can also make sense to have scripts that don't take arguments and only work on the current working directory.
Shell session scripts
A session script is intended to be called in a shell session in your terminal. Any script that is enabled, compatible with the session shell, and marked as a shell script is copied to the target system and placed in the PATH. This allows you to run the script from anywhere in a terminal session. The script name is lowercased and spaces are replaced with underscores, making it easy to invoke the script.
For example, with a simple shell script like
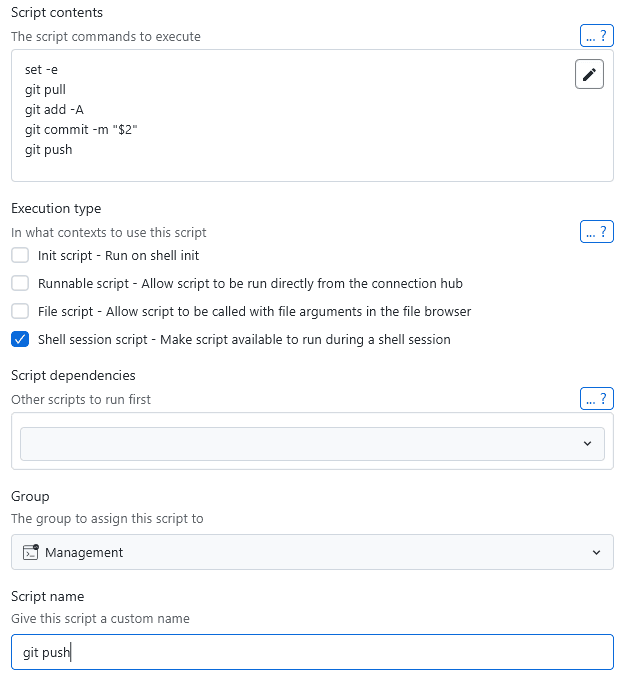
you can run the commands on any compatible system with git-push.sh "<message>" in a terminal session if the script is enabled. The script file will be automatically created by XPipe in the background on the target system and added to the temporary terminal session PATH so that you can run it immediately.