Connection search
Automatically adding connections on remote systems
Introduction
The automatic connection search is a fundamental part of XPipe as everything is designed around automatic detection without any manual configuration. For this reason, many integrations will detect automatically whether a supported component is installed on a remote system, and there is no need to manually configure the integration.
If you're not sure how to add a certain type of connection for an integration, the automatic connection search is usually the first place to look.
Adding connections
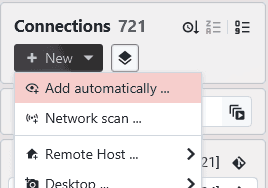
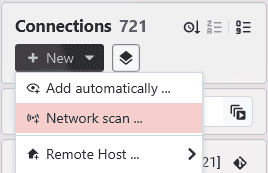
You can find the connection search dialog either in the New menu:
or for any shell connection in the button bar:

Clicking on the button will automatically start the search for available and supported integrations. All detected integrations are shown with a checkbox to either select or unselect them. Integrations that were not found are greyed out:
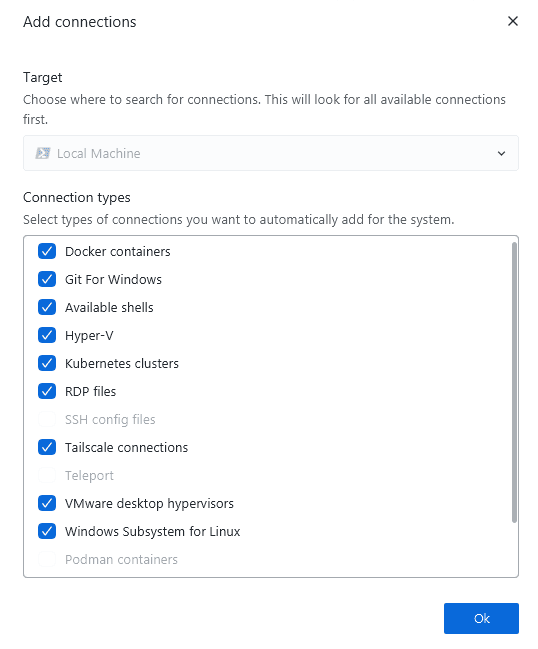
Clicking on ok will proceed to add the selected connections. This will, depending on the integration, either add sub connections automatically or not. For some integrations, you will still have to click on refresh to update the list of available children. Furthermore, some newly added integrations require something like a login or registration in order to work.
Configuration
Just because an integration was found does not mean that it will work and is configured correctly. When adding connections, XPipe mainly checks for the existence of a certain installation, e.g., the presence of a certain executable like docker on the system. Whether your docker daemon in this case is running, configured correctly, and will work upon refresh, is not certain.
If a certain integration is not showing up as expected or is not working correctly even though it should, check out the individual integration guides to learn about the requirements of the integration to work in XPipe.
Adding in bulk
Especially when starting out with XPipe, you might have to search for available connections on many new systems that were just added. For these cases, it is recommended to first turn off the setting to automatically show the search dialog when adding a new connection:

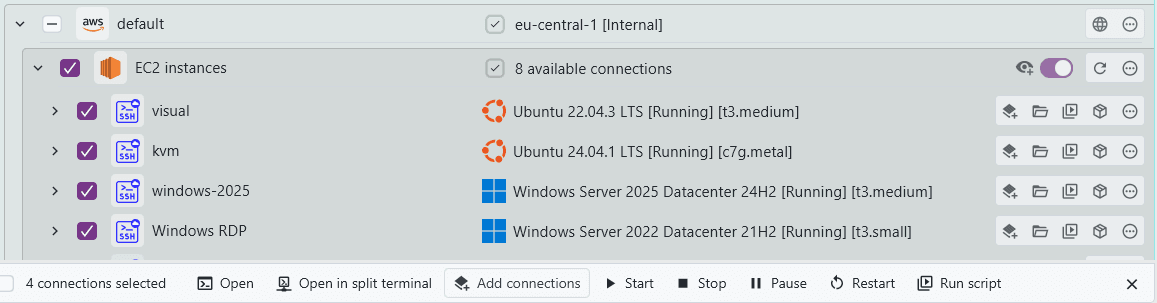
Then, you can use the batch mode to search on multiple systems within one dialog:
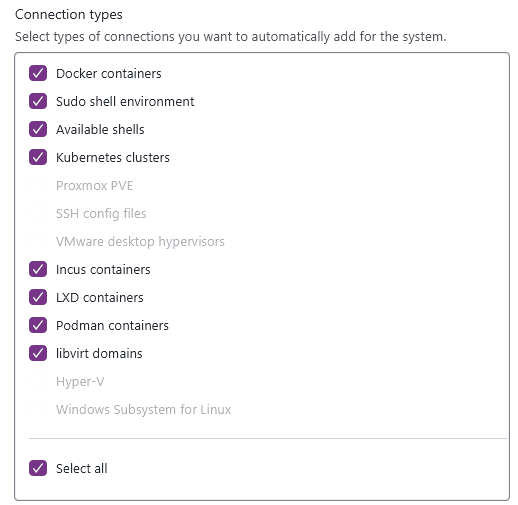
This will show all available types of connections joined together. Ticking a certain connection type will add it for all systems where the connection type is supported:
Network scan
In addition to automatically adding subconnections on an existing system, you can also scan the connected network of a system to add other devices that are available on the network. You can find the network scan in the New menu:
The network scan feature supports local and remote networks. You can freely choose the base host to scan the network from. From there, it will check whether all found systems are listening on the specified port(s). It supports scanning for SSH, RDP, and VNC servers. You can specify multiple ports separated by commas:

Limitations
A network scan will send a broadcast ping to the local subnet broadcast address. This method might not always turn up all devices in a network:
- A broadcast ping sends ICMP packets to devices, but some network configurations might block this
- A system might be configured to not allow broadcasts at all
- A network scan might also be interpreted as malicious by various protection solutions
In summary, don't rely on the network scan featured to actually show all devices.
ARP table
The network scan results that are shown are based on the system's ARP table. As described in the previous section, the networks scan implementation might not result in expected results. If the base network scan method does not show all systems, you can populate a device's ARP table manually using another better network scan method on the system. After that, all systems should show up.